Showing posts with label creative. Show all posts

Tuesday, March 19, 2024

Quilting again


This winter, I've been quilting again. I started with an All About Me quilt for Miss M, who turned 10 in February. 


As part of looking for ideas for that one, I found a pattern I loved. I had barely finished the first quilt before I was working on the second one, which I finished last weekend. 


I took 1.5" strips of black and white, sewed them together, then cut strips that were 3"x18". I sewed a 1" black strip to both sides, then started building the colours on each side. I had a design laid out on graph paper so I knew which colours went where - dark blue, light blue, yellow, orange, pink, red, purple, green. When I had colours on each side of the black and white strip, I cut the squares to 12.5" square. 


It took 49 squares to make the quilt. The back is black. 


I still love it.


Saturday, April 2, 2022

I'm too lazy to go buy a purse

 Today I decided to make a purse. 

I cut 4 sets of 2 pieces of fabric. The outer one pieces were 13"x19"; the inner ones were 13"x20", since there was a direction to that fabric. I then cut the inner ones in half, switched one half upside down, and sewed them back together. 

A piece of fabric that has been cut in half and then sewed back together

Next I cut batting to match the size of the outer fabric and pinned the inner fabric (good side down), the batting, and the outer fabric (good side up). 

A sandwich - inside fabric, batting, outside fabric

I then quilted the three pieces together with diagonal lines and repeated for the next 3 sets. 

The fabric, post-quilting.
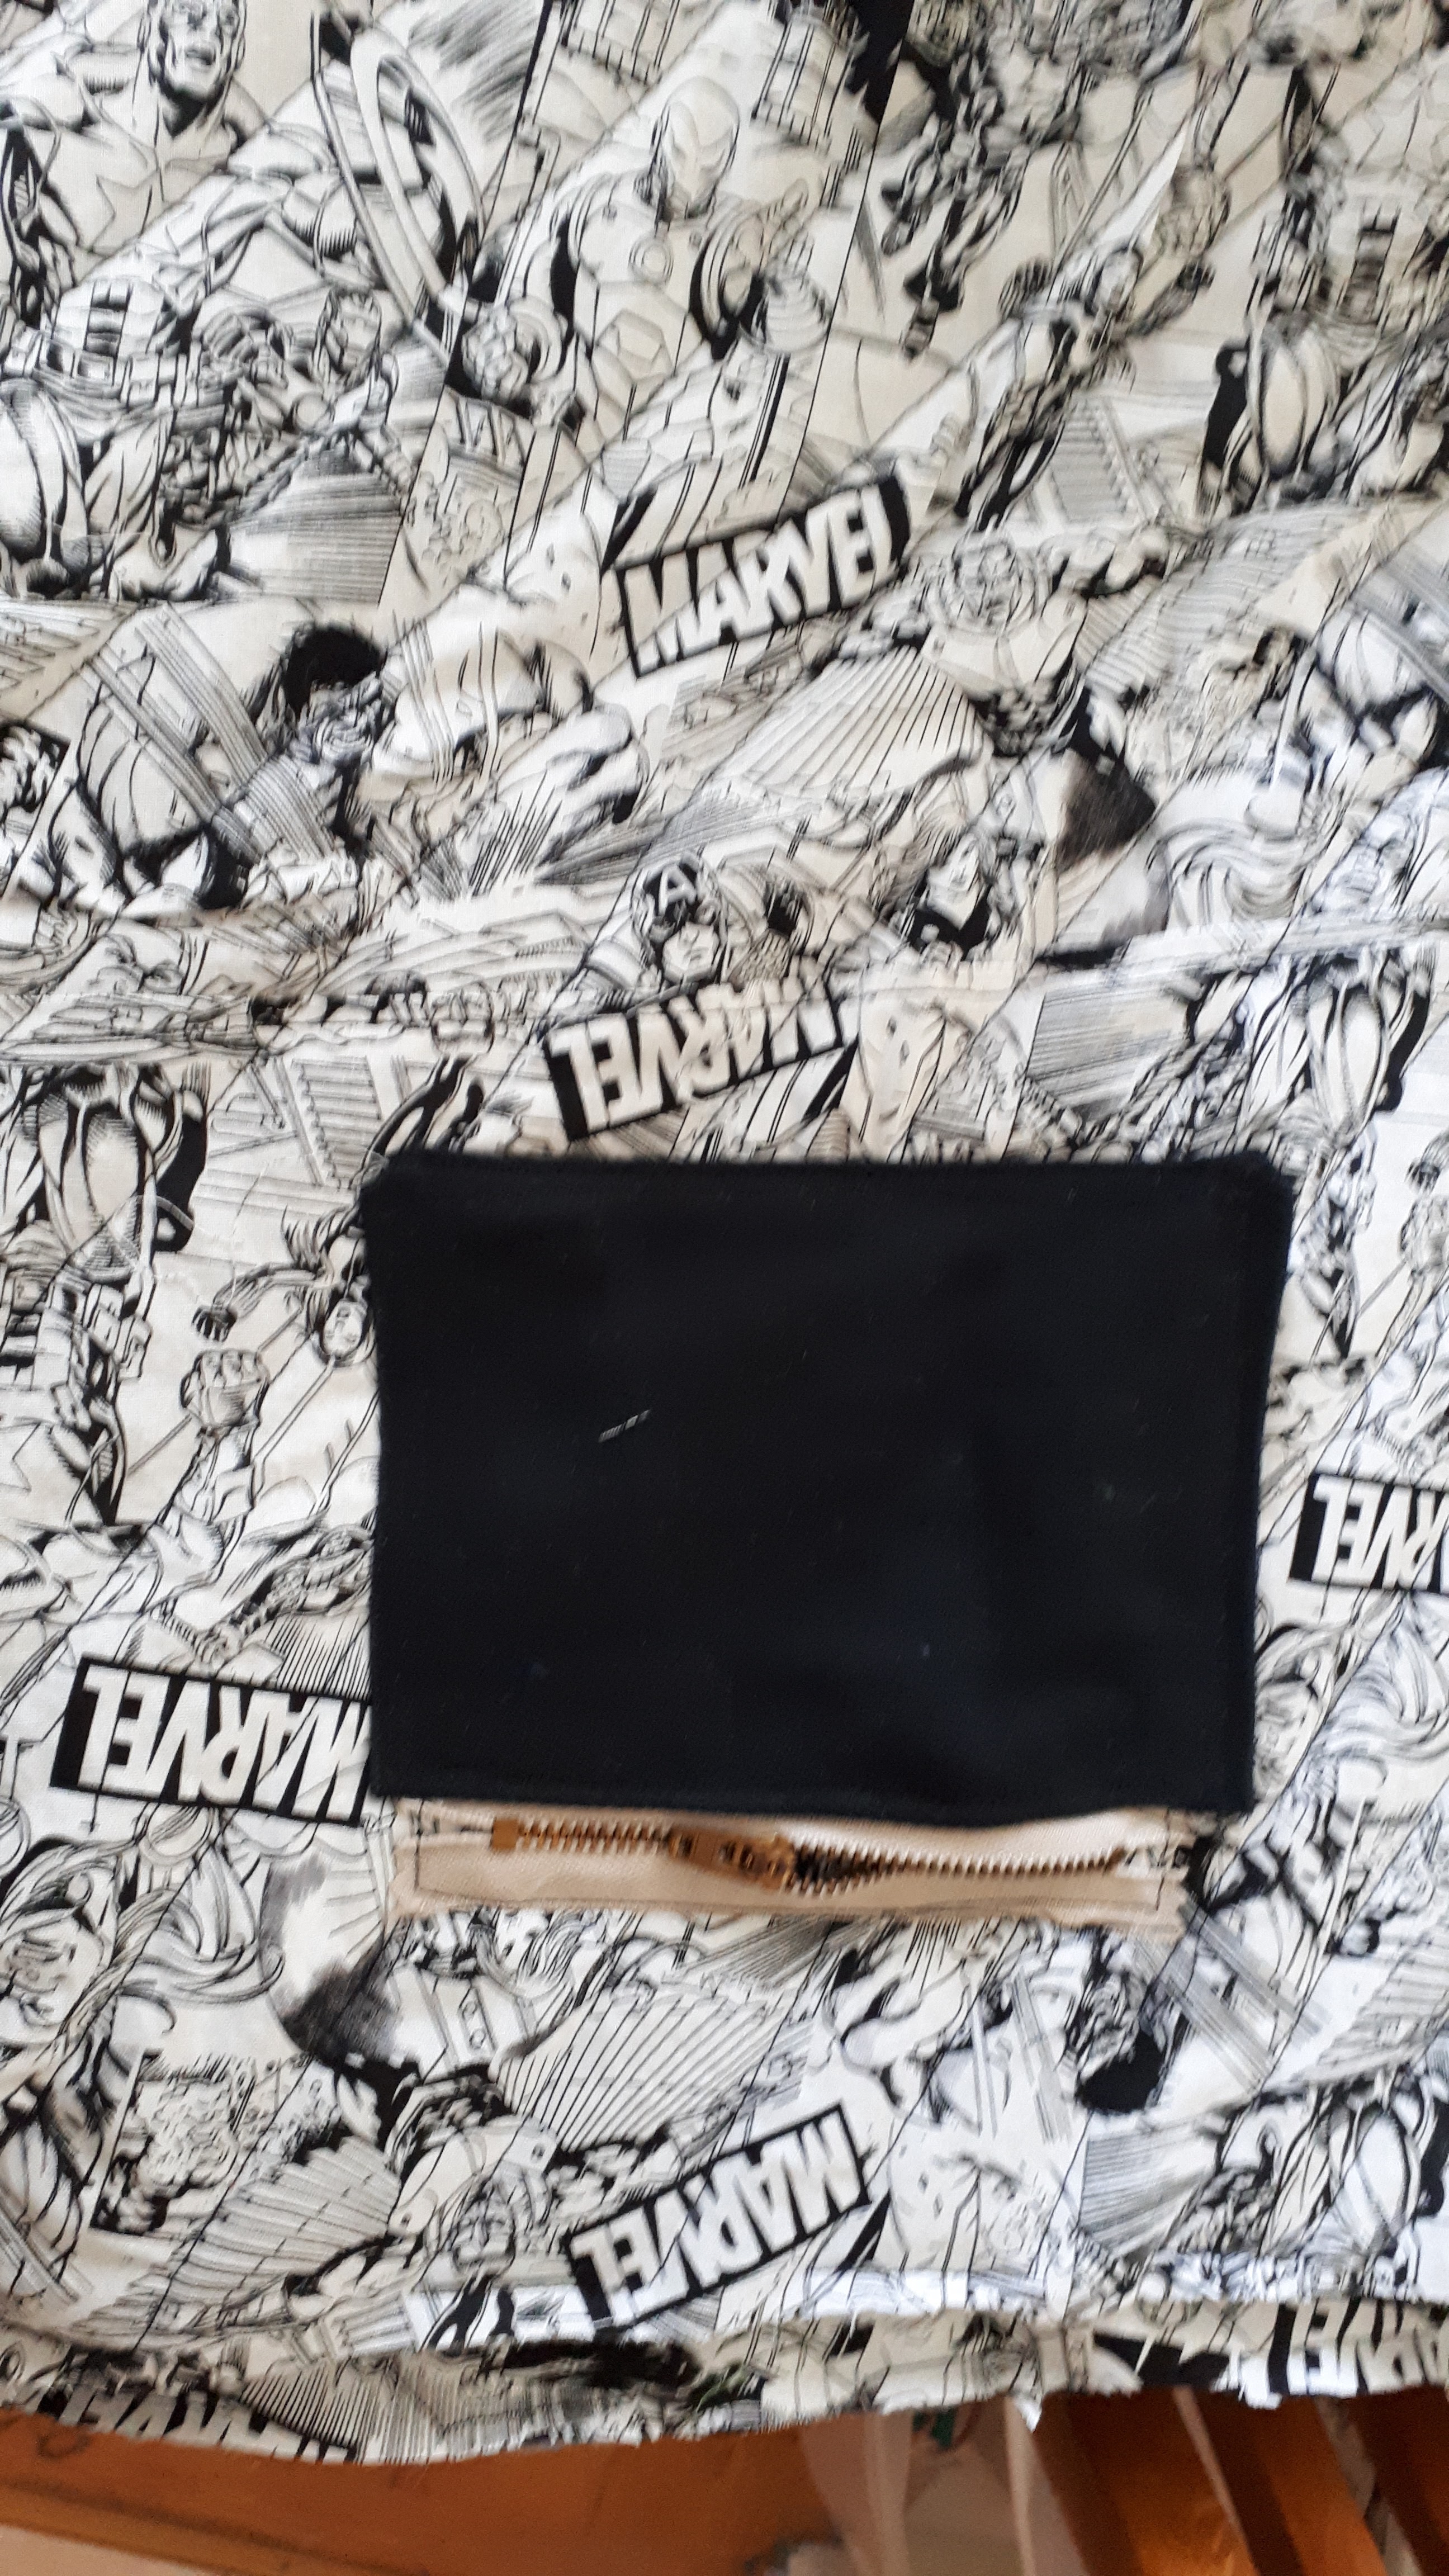
Because I like pockets, I added a small pocket to the inside of one of the 4 sections.
The quilted fabric, with a small pocket added on the inside.

I sewed binding to the top and bottom of each section, then folded each section in half and pinned a zipper near the top. The zipper pull was down, and I sewed the side away from the binding.
A section, with the zipper in place to be sewn.

I then turned each section inside out and pinned the other side of the zipper to the other half of the section, being careful to keep it the same distance from the binding. I unzipped the zipper and sewed that side down. 
The second side of the zipper, pinned to sew.

When all 4 sections were done, I turned them right side out. Next, I cut a flap out of both the inside material and the outside material and sewed them together on 3 sides, then sewed it onto the section with the inside pocket. 

The flap to cover the purse, sewn to one of the 4 sections

I took a piece of cardboard and sewed a piece of the outside fabric to cover it. 


The cardboard, enclosed in fabric on 3 sides, before I sewed up the 4th side.

When it was fully covered, I  attached it to the bottom of the section with the flap. I then attached it to the bottom of another section (making sure that the zippers were going the same way). 


The cardboard section connecting 2 sections

Next, I used bias tape to cover the ends of each section so that they were  closed.
Bias tape pinned on the edge of one section.
x


I used a piece of cardboard to measure the same distance from each side. I then added the two sections that weren't connected to anything in between the other sections, and sewed each one to the next between the markings.
A piece of cardboard marking the distance to sew
I added a closure on the flap and attached the strap, and it's done!


Friday, April 1, 2022

Luggage tags

 Today I made 18 luggage tags for my Girl Guide travel group. 


I started by cutting out two pieces of fabric, 4.5 inches x 7 inches. I then ironed interfacing onto one piece - the one intended for the inside of the tag.


After that, I cut a piece of plastic 4.5 inches x 5 inches and folded it in half so that it was 4.5 inches x 2.5 inches. I then stitched along the fold.

A piece of plastic folded and sewn along the fold


I folded the inner piece of fabric in half, and lined up the stitching on the plastic with the middle of the tag. Next, I unfolded the fabric and stitched around the three sides of the plastic that hadn't already been stitched. 
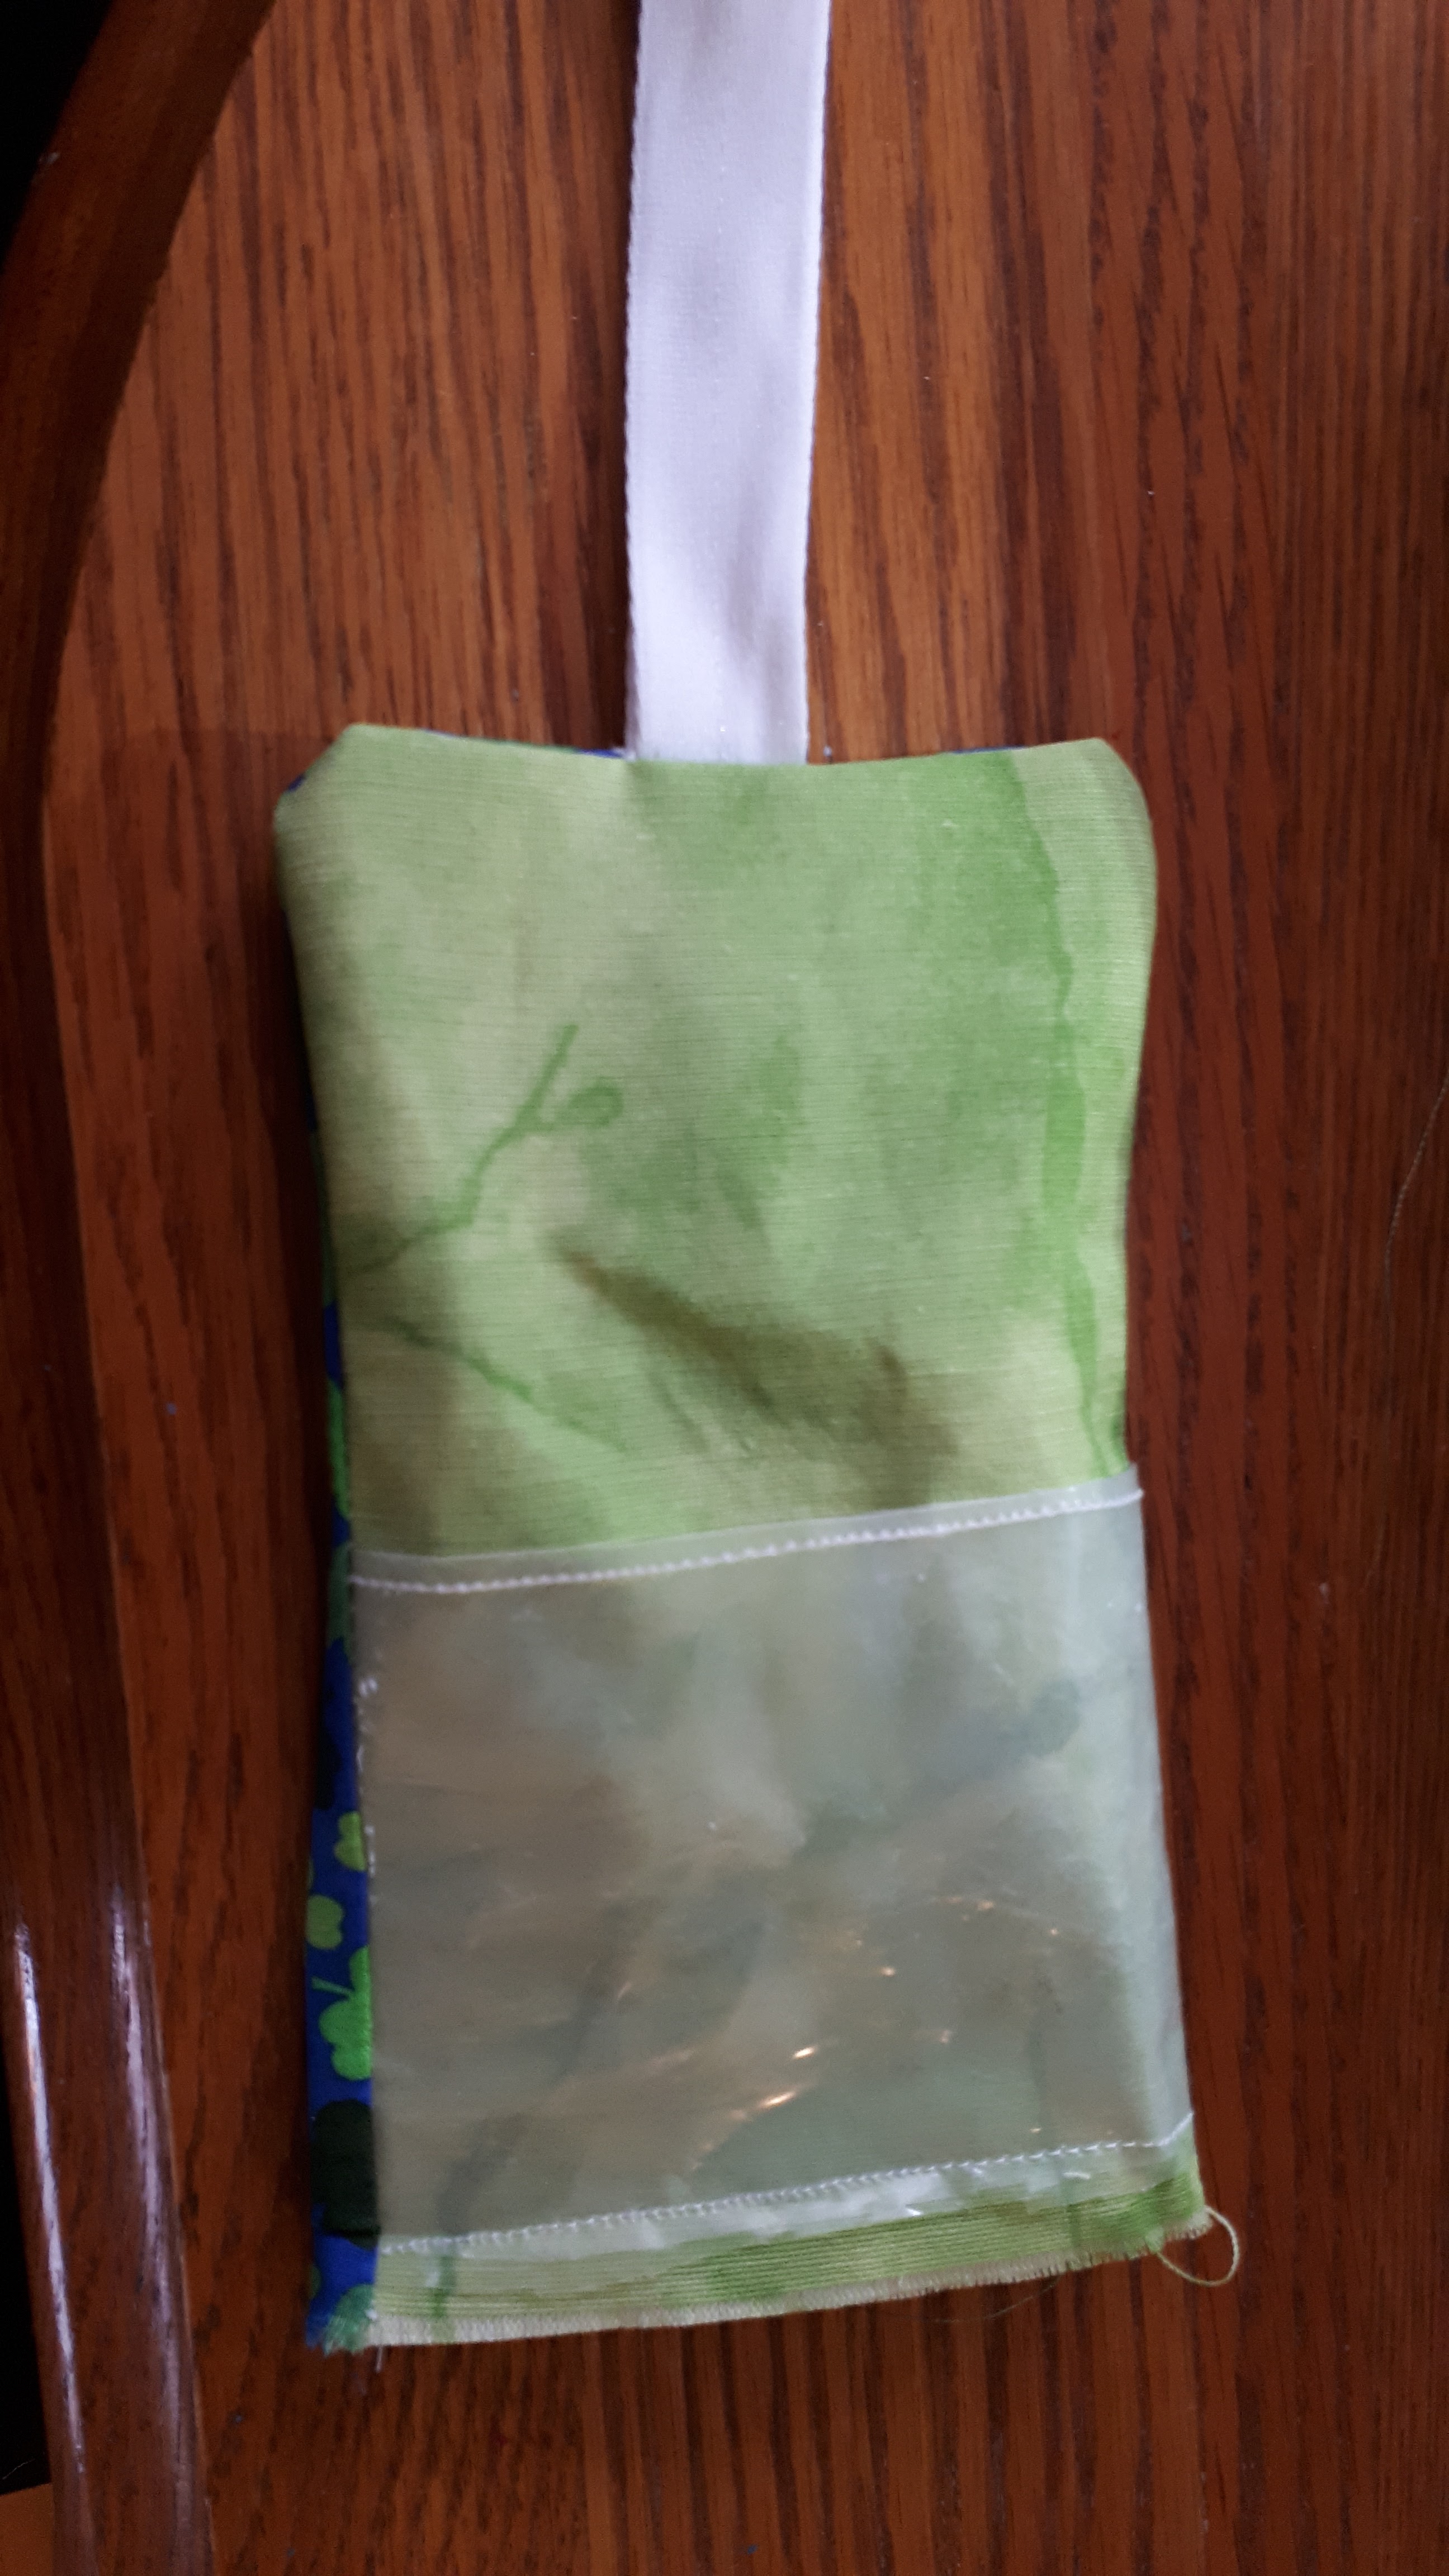
The inner piece of fabric with the plastic pocket stitched onto it. 

 After the pocket is attached, fold 12" of the strap in half and put the open end in the middle of the opposite side of the fabric. Add the fabric for the back of the tag, face down. Sew around 3 sides, leaving the side at the bottom of the pocket unsewn. 

The inner piece of fabric with the plastic pocket sewn on. On the other end of the fabric, there is a loop of the strap.


Clip the corners and turn the luggage tag right side out. 

The turned luggage tag with an open end at the bottom of the pocket.


Take a 3" piece of bias tape (or strapping). Fold in both sides of the unsewn end. Pin the bias tape into the opening so that the two ends have a small gap between them. 

Sew around the luggage tag, starting with the open side, and then end by sewing the open side a second time. Make sure you are catching both ends of the bias tape.


Fold the luggage tag in half and push the strap through the bias tape look. That's it!
Two luggage tags, one open and one closed.


Monday, January 4, 2021

Ukulele

For Christmas, I got a kit to build a ukulele. I was super excited about it.

The bare ukulele kit
First, I painted it. I drew criss-crossing lines on the ukulele, then painted each section a different colour. After that dried, I pained black lines of various widths between the colours. I added one coat of varnish - I didn't want to varnish too much since it might affect the sound.

Then I assembled it. It wasn't difficult, but some instructions would have been nice!


Thursday, December 22, 2016

Tablet cases

Last weekend, I decided to make some tablet cases. I'm sure you can appreciate that it was a total coincidence that it was a week before Christmas. I started with this site and adapted as necessary. I used hard-backed canvas with fun foam glued to it for the inside of the case.


I cut a hole for the camera, and made sure the buttons were accessible.


(Those shears are from Lee Valley and they're awesome.)


They turned out well.


Tuesday, October 25, 2016

Halloween

I'm organizing my community association's haunted house again this year. We are doing a haunted graveyard theme, and I've been busy making props.

I started with eyeball flowers, I glued some floral wire to the back of some dollar store eyeballs.

Next, I cut some green fun foam for the eyelids. 

I added some leaves and they were done.


I also made a crypt. I made a box out of plywood and added some foam to the top. Next, I covered Wanda in garbage bags and packing tape, then cut her out of them to get a Wanda-shaped body form, which I stuffed with newspaper.


I taped that arm back on and covered her body with some fabric, then added a layer of paint mixed with plaster of Paris.


Finally, I made some burning coals. I started by gluing some LED lights to a board and covering some of them with bottles and lids.


I added a layer of spray foam.

And then I spray painted the top black.


And that's what I've been up to.


Tuesday, July 12, 2016

A busy weekend

On the Canada Day weekend, I started feeling more mobile.

I did my own laundry. You have no idea how exciting that was, for both me and Wanda. 

I worked on a messenger bag.


And finally, I started a coffee table. I had a coffee table, but despite living with it for 16 years, I decided it was too big. Time for a change.
I got it mostly built, but not entirely - I had to attach the top, sand, stain, and varnish. I worked on it in the evenings last week and finally finished it last night.


I moved it into the house today. Tomorrow the old coffee table gets donated.


Tuesday, May 5, 2015

Project #1

One of the things I've been doing for the last few weeks is working on projects around the home.

Just after Easter, I saw a necklace holder on Pinterest. (I really should stay off that app!) It looked interesting, and we'd just had sparkling lemonade for Easter, so I saved the bottle and got to work.

I soaked off the label and painted the bottle with a few coats of blue food coloring mixed with mod podge. I wasn't thrilled with how it looked, so I did one last coat of green food coloring and mod podge.

Next, I found a scrap board and drilled a 1" hole in it. (Well, actually, I drilled a 3/4" hole, then discovered it wasn't big enough and tried again.)

A coat of paint and a bunch of cup hooks, and it was done.


Tuesday, May 20, 2014

The saga continues

Remember the table saga? 

After I got the desk together, I realized that the black futon from the other bedroom would look good in that room. It made sense, too - the newly painted room is bigger than the other room.

Except ... my mom is bringing my nieces and my cousin's two girls this summer. It makes sense to put the three girls in the bigger bedroom. But if I moved the futon, there would be no bed in the smaller room. I'm fine with the girls sleeping on air mattresses, but is didn't think my mom would appreciate it.

Ok, move the futon, and get another bed for the small room.

But before I could put a new bed in that room, I had to paint.

Again.

I spent a couple of nights painting, and then I went back to IKEA. I came home with a day bed. Wanda and I spent a couple of days putting it together.

Next I had to figure out the windows. When I painted the smaller bedroom, I took down some white blinds. They could go back up, so I started hanging the brackets.

One broke.

Did you know Home Depot sells extra brackets? Neither did they, but they helped me find them, anyway. I came home and hung the blinds, then decided to make roman blinds to go over them. I found these instructions: http://jenduncan.typepad.com/whats_new/2008/11/roman-blind-tutorial-in-20-pictures-or-less.html.

I went out and bought fabric, and wood, and the rings for the back, but the fabric wasn't wide enough, so I decided to make a scalloped edge - something like this: http://www.coletterie.com/tutorials-tips-tricks/tutorial-scalloped-hem.

On Sunday, I started making the first set of blinds. At 6:30, I realized I didn't buy eyelet screws. Naturally, this was the day before the holiday.

Tonight I stopped on the way home to buy them, and I finished the first blind.


I can't decide if I like the soft look or if I want more structure on the next one.

Wednesday, December 11, 2013

Quilting for Lazy People

Today I thought I'd walk you through the process I go through when I make a quilt.  You can get quilt patterns in lots of places, but I usually don't. I like to start with graph paper, and work on that way what design I want to use. 

Once I have the pattern figured out, I pick out fabrics. I like colour, so I often use a bunch of colours in a single quilt.  

For this quilt, I used a pattern involving triangles.  I started with 4" squares, then cut them in half diagonally. I used 2 fabrics per block.


This pattern used 8 triangles (or 4 of the original squares) of each fabric. 

I matched one triangle of the first fabric to a triangle of the other fabric, then sewed them together along the long edge.

I move from one to the next one without cutting the thread, so they all end up in a chain rather like a sausage. (I hate cutting threads.)
Once I have the triangles sewn into squares, I arrange them to make sure I like the pattern.  Do I want to do blocks like this:
 

Or like this?
 
(Of course, there are other options as well.) Anyway, I chose the second one, and then I flipped one square over the other so that I could sew them together.  That created two strips of 4 triangles each, which I sewed together to make a square.

 When I had all the squares done, I laid them out on the fabric I'd chosen to go between them to find an arrangement I liked. (When I'm using a lot of different colours, I like to have one consistent fabric to tie them together.)

I then ripped 2" strips of the yellow fabric. I started with the middle section, because i had the big panel piece to work around.

Of course, I'm not super exact about how I cut and sew the blocks, so they're not all exactly the same size. That's OK - the yellow hides all of that.


Once I had the top completely done, I layered it with the batting and the flannel back piece. I like to have the batting a little bigger than the top, and the backing a little bigger than the batting.


Pin, being careful to catch all three layers (and not the bedspread it's lying on):
Once it's all pinned, flip it over to make sure the flannel back is lying flat - you don't want to have any folds.


If it's flat, it's time to start quilting.

My plan was to quilt down the yellow strips.

When I was done, I flipped it over again to make sure there were no folds.  Sadly, there were, so I had to rip out that seam and sew it again.  (I rip seams while watching Downton Abbey. I'm totally hooked, but I'm late to the party so I have no one to talk about it with.I just finished season 2.)

Once it was all quilted, the only piece left was the edge  This is where the larger back came in handy.  I folded the edge over once, then again until it overlapped the top (so that the edge is finished):

When I got to the corner, I folded it as I would if I were gift-wrapping a box:
And then again:


I then sewed around the entire edge to secure it, and here's the finished product:


This was a more complicated pattern, so it took about 5 hours from start to finish.